


Light roast espresso is not a compromise, it is its own discipline, and it rewards a different recipe than the one taped to most machines. Start with 18 grams in, 45 grams out, water at 94 to 96°C, and a shot landing between 30 and 38 seconds. If that runs sour or fast, switch to a turbo shot: coarser grind, roughly 6 bar, 15 to 20 seconds, at a 1:2.5 to 1:3 ratio. Expect thinner crema and sharper acidity when it’s dialed in right, not a flaw, just a different target.
TL;DR:
- A fine grind and higher brew temperature of 94 to 96°C are essential for extracting vibrant flavors from light roast espresso beans, which are denser and less soluble.
- Using a turbo shot with coarser grind and lower pressure around 6 bar for 15 to 20 seconds can preserve aromatic clarity but may produce thinner crema and sharper acidity.
- Grinder quality critically limits light roast extraction, as many home grinders cannot reach the fine setting needed for proper flow and timing, often requiring a test at maximum fineness.
- Consistent shot timing and taste depend heavily on proper puck preparation, including distribution and preinfusion, especially to prevent channeling in dense light roasts.
- Knowing the roast date is crucial, as light roasts require a 7 to 21 day rest window for optimal extraction, and traceable, roast-to-order beans improve dialing-in accuracy.
Table of Contents
- Two Starter Recipes for Espresso With Light Roast
- Why Grinder Quality Sets the Ceiling on Light Roast Espresso
- The Four Variables That Actually Control the Cup
- Puck Prep: The Step Most People Skip
- How to Dial In a Light Roast, Start to Finish
- Fixing the Four Most Common Light Roast Problems
- What Roast-to-Order Sourcing Changes About Dialing In
- Storing Light Roast Beans Without Losing the Delicate Notes
- Equipment Care That Matters More for Light Roasts
- Water Quality and Why It Matters More Than You Think
- The Perspective Nobody Gives You on Light Roast Espresso
- Practice Your Dial-In With Beans Made for It
- Sources
- FAQ
Two Starter Recipes for Espresso With Light Roast
Before you touch the grinder dial for the tenth time, try one of these two recipes as written. Both are legitimate starting points, not compromises, and the right one depends on the bean and your machine.
The classic light-roast recipe looks like this: 18 grams dose, 45 grams yield (a 1:2.5 ratio), water temperature at 94 to 96°C (202 to 205°F), total shot time between 30 and 38 seconds. This is the range Puck Yeah’s dialing guide recommends as a baseline before any origin-specific tweaking, and it tracks with what most specialty cafés run for lighter profiles.
The turbo shot trades body for clarity. Drop the dose to 15 to 18 grams, open the grind noticeably coarser than you’d expect, drop pressure to around 6 bar if your machine allows it, and pull for just 15 to 20 seconds at a 1:2.5 to 1:3 ratio. This approach leans on the extraction physics Hendon’s research lays out: shorter, lower-pressure pulls can preserve volatile aromatics that a long, high-pressure extraction tends to cook off or mute.
Quick fixes once you’ve pulled your first shot:
- Tastes sour or sharp: grind finer, raise temperature slightly, or extend the yield a few grams.
- Tastes bitter or astringent: grind coarser, shorten the time, or check for channeling.
- Tastes flat or watery: you’re likely under either dose or pressure. Bump the dose up a gram or check your pump pressure.
Pro Tip: If your machine has pressure profiling, a declining pressure curve (starting at 9 bar and tapering to 6) often gives you the best of both recipes in one pull.
Machines with PID temperature control, adjustable preinfusion, and pressure profiling give you far more room to experiment here than a stock single-boiler machine with a fixed 9-bar pump. That doesn’t mean a basic machine can’t produce a great light roast espresso, it just means you’ll lean more heavily on grind and dose to do the work your machine’s electronics can’t.
Why Grinder Quality Sets the Ceiling on Light Roast Espresso
Light roasts are denser and less soluble than darker beans, so they resist water more. That means you almost always need a finer grind setting than you’d use for a medium or dark roast on the same machine, sometimes by a meaningful margin. Bariscope’s comparison of light and dark roast espresso found that switching roast levels on flat-burr home grinders can shift the useful grind range by 30 to 40 percent, which is often enough to push a mediocre grinder past its usable fine end.
Here’s a simple test to find out if your grinder is the bottleneck:
- Set your grinder to its absolute finest setting.
- Dose 18 grams and pull a shot, timing it carefully.
- If the shot still runs faster than 25 seconds even at the finest setting, your grinder has hit its ceiling. No amount of tamping or distribution technique will fix that.
- If it chokes or stalls completely at the finest setting, back off one or two clicks and reassess your dose instead.
On dose, treat 15 to 20 grams as your practical window. Use 18 grams as your default baseline for most light roasts. Drop to 15 grams when running a turbo shot, since the lower pressure and coarser grind need less coffee to avoid choking. Push toward 20 grams only if you’re chasing more body and your basket is rated for it.
If you’re testing at the finest setting and still can’t hit your target time, or if shots taste consistently flat and muted no matter what you change, that’s a burr quality issue more than a technique issue. Flat burrs generally offer a wider, more forgiving range at the fine end than small conical burrs found in many entry-level grinders. A proper grind dial-in starts with knowing your equipment’s actual limits, not just its dial numbers.
The Four Variables That Actually Control the Cup
Temperature, ratio, pressure, and time all interact, but they don’t interact equally. Get temperature and ratio right first. Pressure and time are the levers you pull once those two are locked in.
Temperature matters more for light roasts than almost any other variable. The University of Oregon’s espresso extraction research recommends 94 to 96°C (202 to 205°F) for light roasts, compared to 92 to 94°C (198 to 201°F) for medium roasts. That two to three degree gap exists because lighter beans retain denser, less-soluble compounds that simply won’t dissolve at lower temperatures, no matter how long you extract.
Ratio and yield shape how sweetness and acidity balance out. The 1:2.2 to 1:3 range is standard for light roasts. Push toward the higher end of that ratio (more water relative to coffee) and you’ll pull out more sugars, softening some of the sharper acidity. Stay tighter at 1:2.2 and you’ll get a more concentrated, brighter cup that can tip into sour territory if your grind isn’t fine enough to compensate.
Pressure is where light roast espresso diverges most from convention. Standard machines run a fixed 9 bar, and that works fine for many light roasts if your grind and distribution are solid. But lower-pressure approaches around 6 to 7 bar, often paired with a coarser grind, can extract a cleaner cup with less of the harshness that high pressure sometimes forces out of dense, underripe-tasting compounds in very light roasts.
Time windows split into two camps. Traditional pulls run 30 to 38 seconds and give you fuller body and more classic espresso texture. Turbo shots at 15 to 20 seconds sacrifice some of that body for a lighter, more tea-like clarity that lets fruit and floral notes come through unmuted.
| Variable | Standard approach | Turbo approach |
|---|---|---|
| Temperature | 94–96°C (202–205°F) | 94–96°C (202–205°F) |
| Ratio | 1:2.2–1:3 | 1:2.5–1:3 |
| Pressure | 9 bar | ~6 bar |
| Time | 30–38 seconds | 15–20 seconds |
| Dose | 18–20g | 15–18g |
Neither approach is objectively better. A washed Central American light roast often shines with the classic recipe’s fuller body, while a delicate natural-process Ethiopian tends to show off its blueberry and jasmine notes more clearly through a turbo shot. Origin and processing method push you toward one camp or the other more than personal preference does.
Puck Prep: The Step Most People Skip
Distribution matters more with light roasts than dark ones, because denser grounds pack less evenly and are more prone to channeling, where water carves a fast path through weak spots in the puck instead of flowing evenly. A channeled shot tastes sour on one sip and bitter on the next, sometimes in the same cup.
WDT (Weiss Distribution Technique) fixes most of this before you ever tamp. Here’s the sequence:
- Dose your coffee into the basket, slightly overfilled.
- Use a WDT tool (a handful of fine needles works, or a dedicated whisk tool) to stir the grounds in small circular motions, breaking up clumps down to the bottom of the basket.
- Level the puck with a straight edge or your finger, checking for any visible high spots or clumps.
- Tamp with firm, even pressure straight down, no twisting.
Preinfusion is the other half of the equation. A 5 to 10 second low-pressure soak before full pressure kicks in lets water saturate the puck evenly before it has to push through under force. This single step does more to prevent channeling in a dense light-roast puck than almost any other adjustment, according to the same practitioner guidance that shapes most modern light-roast recipes.
Pro Tip: Watch your shot stream in the first five seconds. If you see one thin, fast jet instead of an even curtain of drops, you’ve got channeling, and no amount of grind adjustment will fix it. Redo your distribution instead.
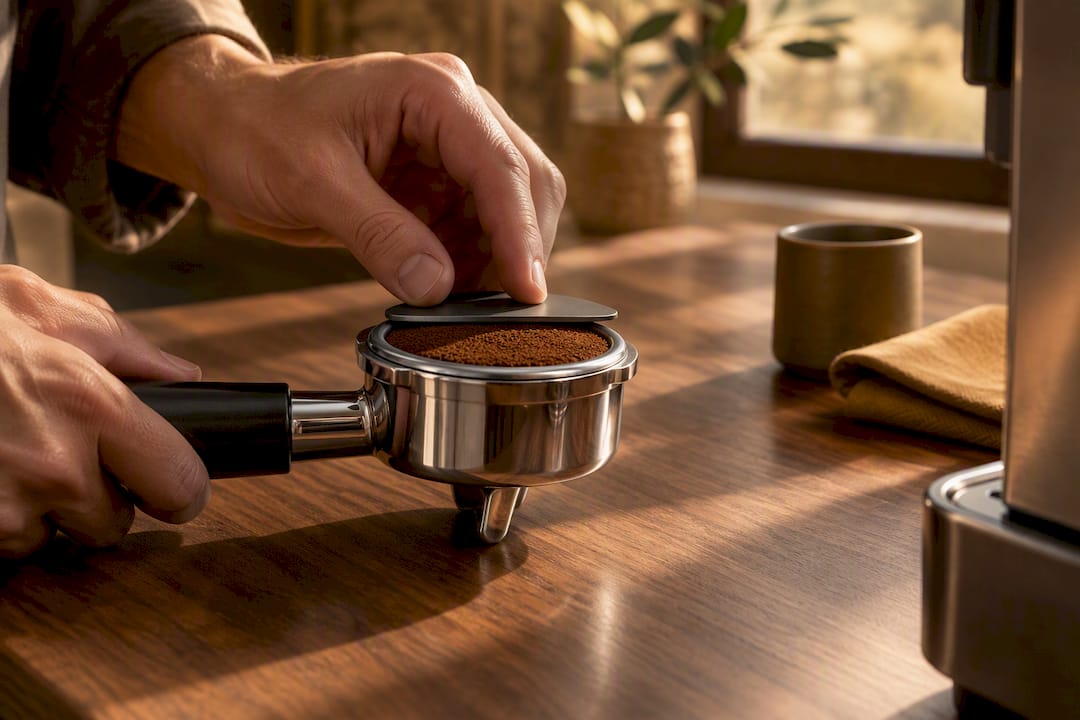
Grind, distribution, and preinfusion aren’t separate fixes, they’re one system. A grind that’s slightly too fine can still work fine with excellent WDT and preinfusion. The same grind with a lazy, uneven tamp will choke and channel at once.
How to Dial In a Light Roast, Start to Finish
Getting from a cold machine to a repeatable, documented recipe takes one focused session and a notebook. Here’s the order that actually works.
- Warm up properly. Flush the group head, let the machine sit at a stable temperature for at least 15 to 20 minutes, and preheat your portafilter and basket with hot water. A cold portafilter alone can drop your effective brew temperature enough to shift a shot from bright to sour.
- Pick your starting point. Use the classic recipe (18g in, 45g out, 94 to 96°C) unless you already suspect a turbo shot suits the bean, in which case start there instead.
- Pull and time it. Note the exact time from the moment you hit the button to the moment you stop the shot, not just when drops first appear.
- Taste and evaluate. Sour and thin means under-extracted. Bitter and harsh means over-extracted or channeled. Flat and muted usually means your temperature is too low.
- Change one variable. If it’s sour, go finer first, no longer. A finer grind fixes sourness more reliably than simply letting the shot run longer, according to community-tested dialing experience. Grind adjustments outperform brute-force time changes almost every time.
- Repeat until the timing and taste line up, adjusting only one variable per pull so you know what actually caused the change.
- Log everything. Record dose, grind step number, temperature, final yield, total time, and a one-line taste note for each pull. Without this, you’ll re-solve the same puzzle every time you open a new bag.
Roast date changes this whole equation. Light roasts typically need 7 to 21 days off roast before they hit a stable, sweet extraction window. Beans pulled too fresh often taste unpredictable, sometimes sour, sometimes gassy, regardless of how well you dial the recipe. If a bag isn’t performing, check the roast date before you blame your technique. A broader look at what dialing in actually means covers the same logic for other roast levels, if you want the fuller picture.
Fixing the Four Most Common Light Roast Problems
Most light-roast espresso problems fall into one of four buckets, and each has a first-line fix worth trying before you overhaul your whole recipe.
- Sour and bright, running fast: classic under-extraction. Grind finer, raise temperature toward the 96°C end of the range, or let the yield run a few grams longer.
- Harsh, astringent, or woody: usually over-extraction or channeling, not just “too strong.” Grind coarser, check your WDT and tamp for clumps, and shorten the time if it’s still bitter after fixing distribution.
- Gushing fast but still tastes sour: this is a grinder ceiling problem, not a technique problem. Try the turbo shot recipe instead of fighting a grinder that can’t go fine enough, or drop pressure to around 6 bar with a coarser grind.
- Choked and painfully slow: grind coarser, drop the dose by half a gram, and inspect the puck for clumping that a rushed WDT pass missed.
What Roast-to-Order Sourcing Changes About Dialing In
Traceable, roast-to-order coffee gives you something a supermarket bag never can: a real roast date to plan around. Since light roasts need that 7 to 21 day rest window to hit peak extraction, knowing exactly when a bag left the roaster changes how you time your dial-in sessions.
For anyone dialing in multiple origins, the Single Origin Favorites Sample Pack solves a real problem: buying full bags to test three or four different profiles wastes coffee and money when half the bag goes stale before you’ve finished dialing it in.
Current product options worth knowing for light-roast work include tea selections, flavored coffees with fruit notes, fuller-bodied blends suited to classic longer pulls, a complex multi-bean blend, and cold brew coffee for those wanting the same beans without dial-in work.
Storing Light Roast Beans Without Losing the Delicate Notes
Light roasts lose their brightest aromatics faster than dark roasts do, mostly because their cell structure is less broken down by heat, which means it’s also less protected from oxygen and moisture once the bag is opened.
Keep beans in an airtight container away from light and heat, ideally in a cabinet rather than next to the espresso machine where ambient warmth builds up over a day. Skip the refrigerator and freezer for beans you’ll use within a few weeks. The moisture cycling from repeated temperature changes does more damage to flavor than room-temperature staleness does over that timeframe. Freezing only makes sense for beans you won’t touch for a month or more, and even then, portion them into single-use amounts before freezing so you’re never thawing and refreezing the same batch.
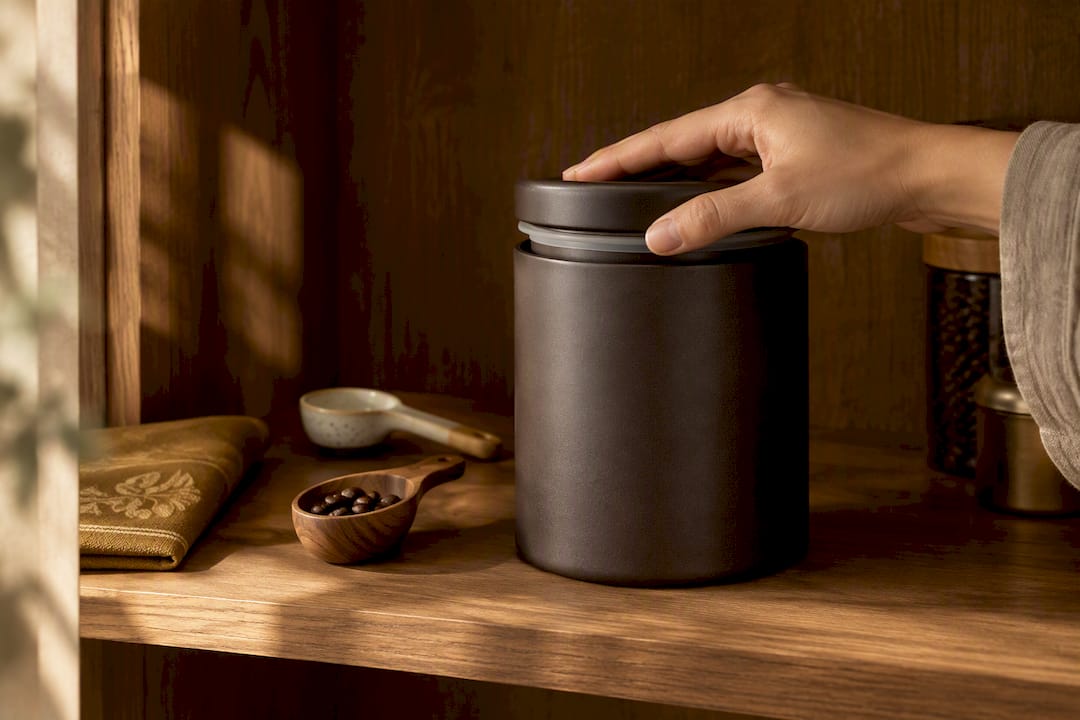
Buy in quantities you’ll finish within three to four weeks of the roast date. Light roasts don’t have the same margin for error that a dark roast’s heavier oils and more broken-down structure allow. A bag that sat open on the counter for six weeks will still make coffee, it just won’t taste like the bright, complex cup you paid for.
Grind only what you’re brewing that session. Pre-ground light roast loses its top aromatic notes within minutes of grinding, well before staleness becomes a taste problem in whole bean form.
Equipment Care That Matters More for Light Roasts
Light roast espresso is less forgiving of equipment drift than dark roast, mostly because the flavor window you’re aiming for is narrower to begin with. A few maintenance habits pay off more here than they do with darker beans.
Temperature stability is the biggest one. If your grind and dose haven’t changed but your shots start drifting between sour and flat from one pull to the next, check your machine’s temperature consistency before touching the grinder again. PID-controlled machines hold temperature far more precisely than older thermostat-based models, and that precision matters more for light roasts, where a two-degree swing can push a shot from balanced to sour.
Burr maintenance deserves more attention too. Oily residue and fines buildup affect grind consistency at fine settings more than at coarse ones, since there’s less room for particles to move before they clump. Clean your burrs on a regular schedule, not just when grinding feels off, since by the time you notice a problem, you’ve probably been pulling inconsistent shots for weeks.
Descaling on schedule keeps your thermal block or boiler delivering water at the temperature you dialed in. Mineral scale insulates heating elements, and that insulation shows up as inconsistent extraction long before it shows up as a visible problem.
A basket that’s mismatched to your dose also causes more trouble with light roasts. A 20-gram basket running a 15-gram turbo shot dose won’t distribute water evenly, since there’s too much empty headspace for water to channel through before it ever reaches the coffee properly.
Water Quality and Why It Matters More Than You Think
Water makes up roughly 98 percent of what ends up in your cup, and its mineral content directly affects how well it dissolves the delicate compounds locked inside light roasted beans. Water that’s too soft extracts weak, flat shots no matter how precise your other variables are. Water that’s too hard leaves you with harsh, sometimes chalky bitterness that masks the fruit and floral notes light roasts are prized for.
If your tap water tastes off on its own, it will taste off in your espresso too, only concentrated. Filtered water with balanced mineral content, rather than distilled or reverse-osmosis water with nothing in it, tends to extract more evenly. Distilled water actually struggles to extract coffee properly because it has nothing to bond with the soluble compounds during extraction.
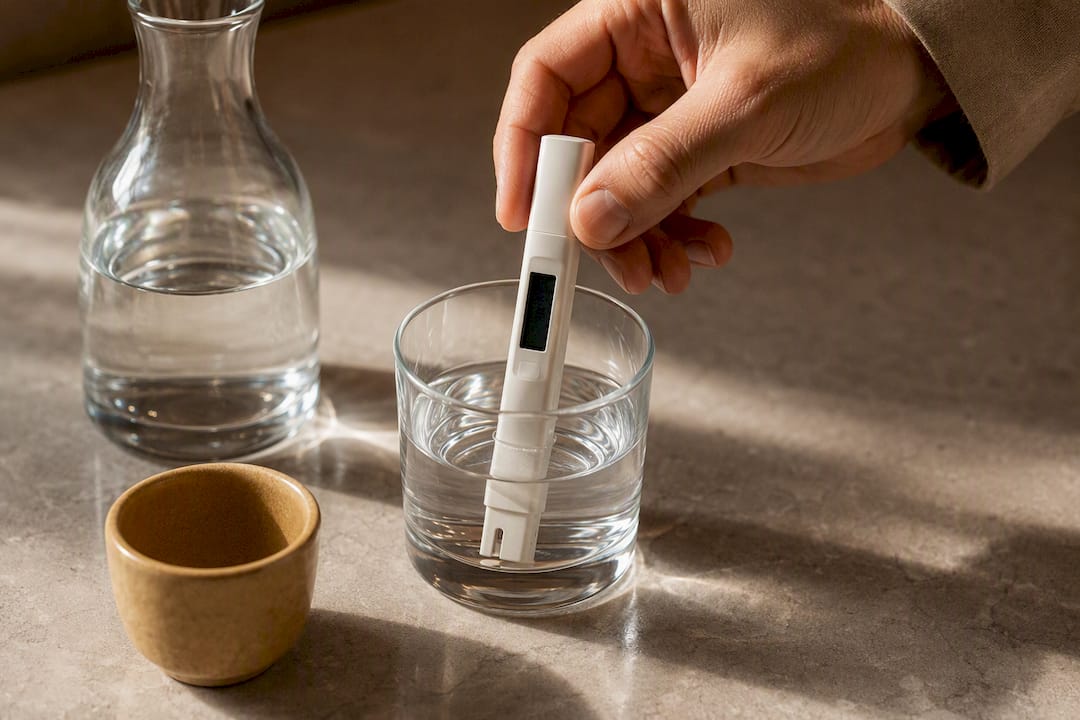
If you’ve nailed your temperature, ratio, grind, and distribution and shots still taste inconsistent or muted, water is worth testing before you blame the beans or the equipment. A simple TDS (total dissolved solids) meter, available for a modest cost, tells you where your water falls and whether it’s worth filtering before it hits the machine.
The Perspective Nobody Gives You on Light Roast Espresso
Most espresso advice still treats light roast as a workaround, something you tolerate if you’re chasing fruit notes, rather than a technique with its own internal logic. That framing is backwards. The dense, less-soluble structure of a light roast isn’t a flaw to engineer around, it’s a variable that rewards precision the same way a dark roast rewards forgiveness.
The biggest gap between what’s commonly taught and what actually works is the instinct to fix sourness by running the shot longer. Grinder-first thinking solves more problems, faster, with less waste. A finer grind gets you there in one adjustment instead of three.
If there’s one thing worth prioritizing above all else, it’s the grinder test outlined earlier in this piece. Most disappointing light roast shots trace back to a grinder that hit its ceiling before the recipe ever had a chance to work. Fix that limitation first, and half the “light roast just doesn’t work for me” complaints disappear on their own.
— Yasin Sofyian Ayesh
Practice Your Dial-In With Beans Made for It
A traceable, roast-to-order approach means you always know exactly how many days off roast your bag is, which takes the guesswork out of timing your dial-in sessions around that 7 to 21 day rest window. That’s the real advantage over grabbing a bag off a grocery shelf with no roast date printed anywhere.
The Single Origin Favorites Sample Pack is built for exactly this kind of practice. Instead of committing to a full bag of one origin, you get several distinct profiles to test the classic recipe against the turbo shot, side by side, without wasting half a bag figuring out which approach a given bean prefers. Check the roast date listed on each product page before you buy, and plan your first pull for somewhere inside that rest window rather than the day it arrives. Once you’ve found an origin you love, the full single-origin collection has the range to keep exploring.
Sources
- Matter: Espresso extraction (Christopher Hendon et al.)
- Puck Yeah — Light roast espresso guide
- Bariscope — Light roast vs dark roast for espresso
FAQ
Is Light Roast Okay for Espresso?
Yes. Light roast espresso is a well-established specialty approach, not a workaround, and it can produce vibrant, fruit-forward shots when the recipe accounts for the bean’s density. It typically needs a finer grind, higher temperature (around 94 to 96°C), and more careful distribution than a medium or dark roast on the same machine.
What’s the Difference Between Light and Dark Roast Espresso?
Light roast espresso is denser and less soluble, so it needs higher brew temperatures, finer grind settings, and often a higher yield ratio to extract properly. Dark roast espresso is more porous and soluble, extracting more easily at lower temperatures with a wider margin for grind error, which is part of why it became the traditional espresso default.
Is Light Roast the Same as Blonde Espresso?
Not exactly. Blonde espresso is a specific marketing term some chains use for a particular light-roast blend served as espresso, while light roast espresso refers broadly to any espresso pulled from beans roasted to a lighter degree. The brewing principles, higher temperature, finer grind, and careful distribution, apply to both.
What Are the Drawbacks of Light Roast Coffee?
Light roast espresso has a narrower margin for error: small grind or temperature mistakes show up more obviously as sourness or thinness than they would in a dark roast. It also produces less crema and typically needs a grinder capable of a genuinely fine setting, which can be a limiting factor on lower-end equipment.


