


TL;DR:
- Cupping coffee at home helps tasters accurately evaluate flavor by removing brewing variables and assessing the beans directly.
- Using proper equipment, consistent ratios, and following precise steps enhances the ability to distinguish origin, roast level, and freshness traits.
Most coffee drinkers taste the same cup every morning and wonder why one bag excites them while another disappoints. Without structure, that question stays unanswered. This cupping coffee at home guide gives you the method professional tasters use to unlock what’s actually in your cup. Cupping strips away brewing variables so you can evaluate flavor directly. Whether you’re trying to understand what separates an Ethiopian natural from a Colombian washed, or just want to sharpen your palate, this guide walks you through every step with the precision that makes the difference.
Table of Contents
- Key Takeaways
- Your cupping coffee at home guide: setup and equipment
- The step-by-step cupping process
- How to assess and score coffee during cupping
- Common mistakes in home cupping
- Developing your palate over time
- What cupping actually taught me
- Start your cupping sessions with Qahwatalard
- FAQ
Key Takeaways
| Point | Details |
|---|---|
| Use the right ratio | The SCA standard of 8.25g per 150ml amplifies flavor clarity better than typical brew ratios. |
| Taste at multiple temperatures | First sip at 155°F, then at 140°F and 130°F to catch sweetness, acidity, and balance as they develop. |
| Cup blind for accuracy | Don’t read the flavor notes on the bag before cupping or you’ll find what you expect, not what’s there. |
| Freshness matters most | Beans older than 2 to 3 weeks have already lost significant aromatic quality before you start. |
| Limit your session | Cap home cupping at 3 to 6 coffees per session to keep your palate sharp enough to discriminate. |
Your cupping coffee at home guide: setup and equipment
You don’t need a professional lab. You do need consistency. The biggest mistake beginners make is improvising their setup and then blaming the coffee when results feel muddled. Here’s what you actually need and what each piece does.
| Tool | Recommended option | Beginner alternative | Role |
|---|---|---|---|
| Scale | 0.1g precision digital scale | Kitchen scale with 1g increments | Accurate dose measurement |
| Grinder | Burr grinder (medium coarse) | Blade grinder as last resort | Consistent particle size |
| Cupping bowls | 6 to 8 oz ceramic cups | Wide-mouth mugs | Heat retention and surface area |
| Cupping spoon | Shallow round bowl spoon | Soup spoon | Slurping and tasting |
| Kettle | Temperature-controlled gooseneck | Standard kettle with thermometer | Water temperature precision |
| Timer | Any phone timer | Any stopwatch | Timing steep and crust break |
The grind size you use for cupping sits between drip and French press. A medium coarse grind gives enough surface area for extraction without turning muddy. Water quality shapes the cup as much as the bean. Use filtered water if your tap water tastes chlorinated. Hard or heavily mineral water will flatten the acidity you’re trying to detect.
Consistency between cups matters more than perfection in any single cup. If you use 8.25g in one bowl and 9g in another, you’re no longer comparing coffees. You’re comparing doses.
Pro Tip: You can find serviceable cupping spoons, simple ceramic bowls, and a basic burr grinder for under $60 total. Read more about setting up your space in Qahwatalard’s premium coffee gear overview before buying anything.
The step-by-step cupping process
Follow these steps in order. Skipping or compressing them defeats the purpose of the protocol.
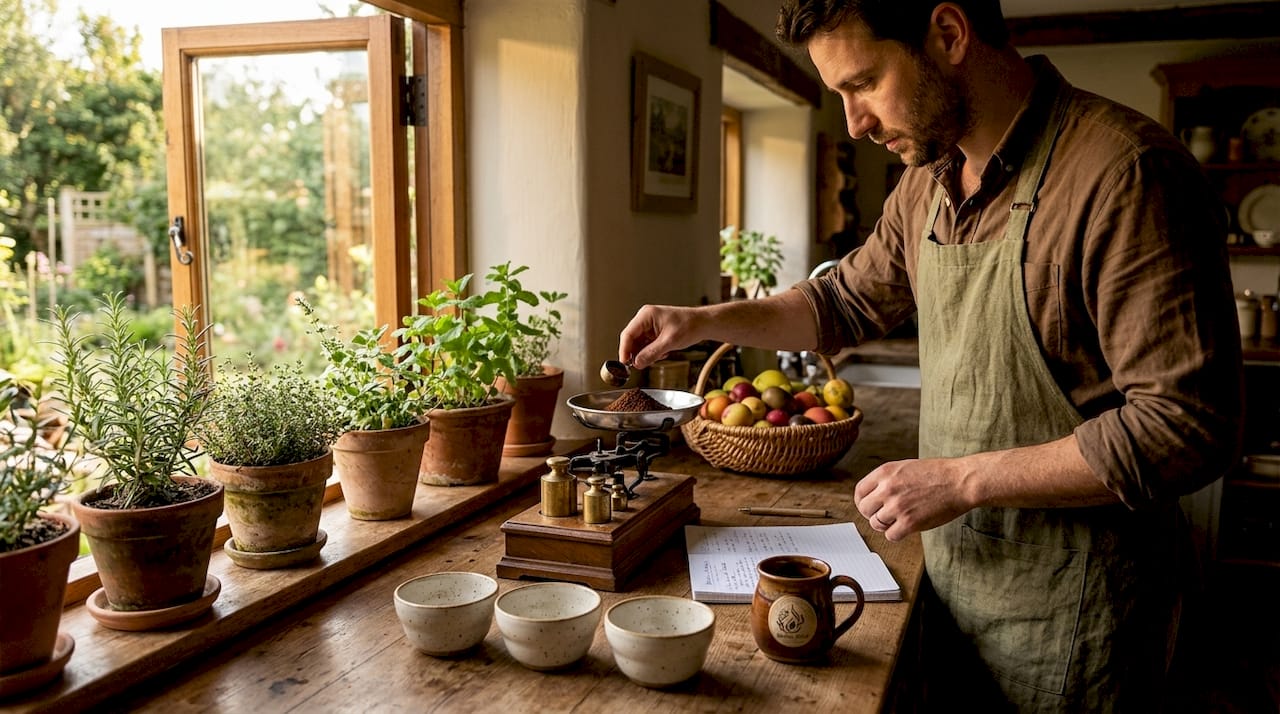
- Dose and grind. Weigh out 8.25g per 150ml of water for each cup. Grind immediately before the session, never the night before. Set your grinder to medium coarse.
- Evaluate the dry aroma. Before pouring any water, put your nose close to each dry ground sample and breathe in slowly. Note what comes up. Floral, chocolatey, earthy? This pre-water stage reveals volatile aromatics that disappear once water hits.
- Pour the water. Heat your water to about 93°C (200°F). Pour in a steady circular motion to saturate all the grounds evenly. Fill each cup to the top of the grounds. Start your timer immediately.
- Steep for 4 minutes. Don’t touch the cups. A crust of grounds will form on the surface. Leave it. The crust is doing work, trapping volatile aromatics under the surface.
- Break the crust. At exactly 4 minutes, use your spoon to push through the crust with three gentle forward strokes. Keep your nose directly over the cup as you do this. This is the wet aroma moment and it’s often the most expressive part of the session.
- Skim the surface. Use two spoons to remove the remaining foam and floating grounds from the surface. You want a clean liquid surface for tasting.
- First tasting: 155°F. Begin tasting when the cup hits 155°F. Load your spoon and slurp aggressively. The goal is to spray the coffee across your entire palate. You’re not sipping politely. A loud slurp is correct technique.
- Second tasting: 140°F. Wait about 4 to 6 minutes. At 140°F, sweetness perception peaks and acidity starts to clarify. Take notes on how the flavor has shifted.
- Third tasting: 130°F. By this point, the cup is warm but fully approachable. Balance, body, and aftertaste become much clearer at this temperature range.
Pro Tip: Between samples in the same round, rinse your spoon in warm water and spit rather than swallow if you’re cupping multiple coffees. Swallowing caffeine from 5 or 6 cups mid-session affects your palate and focus.
How to assess and score coffee during cupping
Knowing what to taste is half the skill. The five key evaluation dimensions used by professional cuppers give you a structured framework instead of vague impressions.
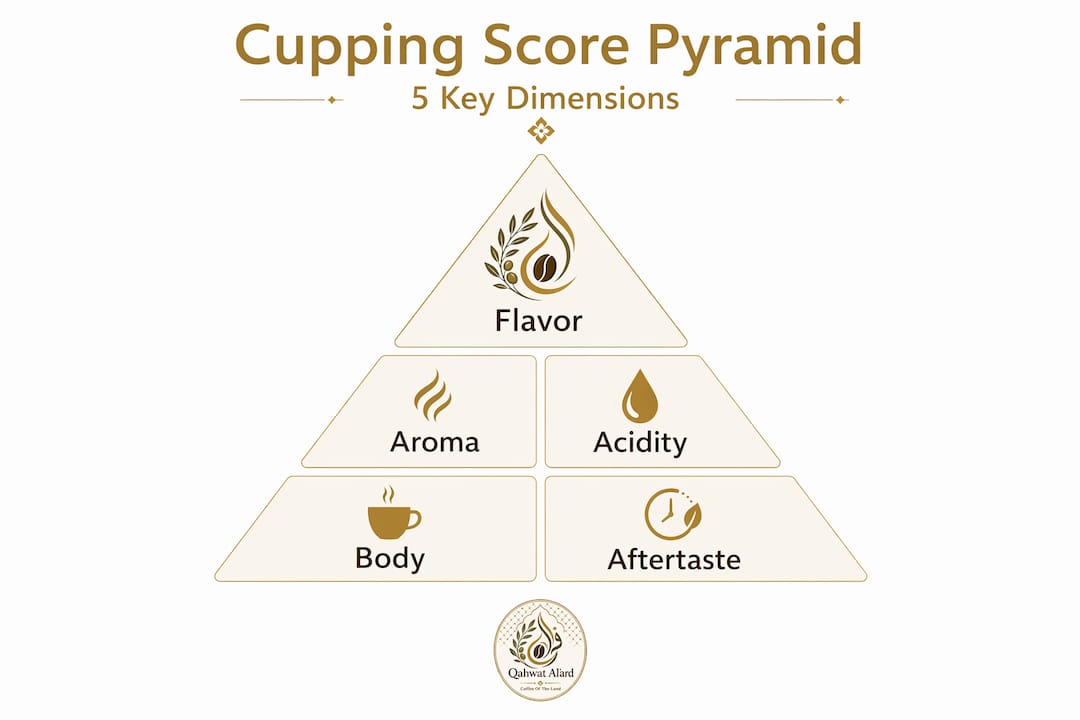
| Dimension | What to look for | Scoring range (SCA) |
|---|---|---|
| Aroma | Intensity and quality of dry and wet fragrance | 6.00 to 9.75 |
| Flavor | Breadth and complexity of taste mid-palate | 6.00 to 9.75 |
| Acidity | Quality of brightness: clean or harsh? | 6.00 to 9.75 |
| Body | Weight and texture on the palate | 6.00 to 9.75 |
| Balance | How well all attributes work together | 6.00 to 9.75 |
The SCA scoring system uses quarter-point increments from 6.00 to 9.75 for each attribute. You don’t need to replicate that precision at home. A simple 1 to 10 scale per dimension works fine. What matters is that you score every cup the same way.
Here are sensory tips that will sharpen your evaluations quickly:
- Taste without reading the bag first. Reading flavor notes beforehand primes your brain to find those notes whether they’re present or not.
- Describe acidity by its quality, not just its presence. “Bright and citrus-like” is more useful than “acidic.”
- Note the aftertaste. A finish that lingers cleanly for 30 seconds tells you something about bean quality that a quick sip misses.
- Draw a distinction between roast characteristics and origin characteristics. Dark roast chocolatey notes come from the roaster’s choices. Floral notes from an Ethiopian Yirgacheffe come from the origin’s terroir.
- Use a simple paper scoresheet or a notes app. The act of writing forces you to commit to an observation instead of letting it blur.
Common mistakes in home cupping
Most of the errors that ruin a cupping session happen before the first sip.
Using beans that are too old. Aromatic compounds in coffee degrade after 2 to 3 weeks post-roast. If you’re cupping stale beans, you’re not evaluating the coffee. You’re evaluating the damage done by time. Always check the roast date, not the “best by” date.
Tasting too hot. Sipping coffee above 160°F numbs the receptors you need. You’ll taste heat and not much else. Patience at this stage is not optional.
Cupping too many coffees at once. Professional sessions cap at 3 to 6 samples for exactly this reason. Aroma overload blunts your ability to discriminate. For beginners, start with 2 or 3 coffees.
“The palate fatigues before the mind does. Cuppers who push through 10 samples thinking they’re being thorough are usually producing less reliable data than someone who evaluates 4 with full attention.”
Additional mistakes worth watching for:
- Rushing the steep to under 4 minutes, which underextracts and gives flat results
- Skipping the crust break stage, which is where a large portion of aroma information lives
- Failing to clean your spoon between cups, which cross-contaminates samples
Pro Tip: Build a physical flavor reference library. Keep a small bowl of raw cashews for buttery body reference, fresh lemon zest for high acidity, dark chocolate for roasty bitterness, and dried apricot for the stone-fruit notes common in naturals. Smelling and tasting these before a session calibrates your palate better than any verbal description.
Developing your palate over time
Cupping once is interesting. Cupping consistently is where real skill forms. Comparative tasting accelerates palate development faster than brewing one cup at a time because you’re evaluating differences in real time, side by side.
Here’s a practical training progression you can follow over several months:
- Week 1 to 4. Cup the same coffee brewed through different methods: cupping bowl, French press, pour-over. Learn how method changes perception of the same bean.
- Week 5 to 8. Cup two or three coffees from the same origin but different roast levels. Notice what roasting adds or removes.
- Week 9 to 12. Cup coffees from different origins at the same roast level. Begin connecting flavor profiles to geography.
- Month 4 onward. Introduce triangle testing. Brew two identical cups and one different cup, then taste all three blind and identify the odd one out. Triangle testing confirms whether your palate can actually discriminate between coffees or whether you’re identifying a difference that isn’t there.
Keep your tasting notes session by session. Patterns emerge over time, and reading back through your notes from two months ago shows you exactly how your sensory vocabulary has grown. That feedback loop is motivating and accurate.
Exploring flavor complexity in coffee in depth will also help you name what you’re detecting before you have the language for it.
What cupping actually taught me
I’ll be honest: the first time I cupped at home, I was certain I’d taste clear differences between two coffees I thought I knew well. I didn’t. They tasted nearly identical. That result wasn’t a failure. It told me my palate needed calibration, not that the coffees were the same.
Blind cupping revealed something uncomfortable. I had been making buying decisions based on packaging and descriptions rather than what was actually in the cup. Once I removed those cues, my preferences shifted. Coffees I assumed I wouldn’t like scored higher for me than bags I had consistently repurchased.
The freshness lesson hit even harder. I had beans I thought were “pretty fresh” at four weeks off roast. Cupping them next to something roasted six days earlier made the older beans taste flat in comparison. The difference wasn’t subtle.
My advice: don’t treat cupping like a test you have to pass. Treat it like a conversation with the coffee. Some sessions produce clear insights. Others just raise more questions. Both outcomes move you forward. The scientific method and genuine curiosity aren’t opposites. The best cuppers I’ve encountered hold both at the same time.
— Anthony-Yasin
Start your cupping sessions with Qahwatalard
Ready to put this guide to work? The quality of your cupping sessions depends heavily on the coffee you start with.
Qahwatalard’s single origin collection is sourced directly from renowned growing regions with roast dates you can verify, giving you the freshness your cupping sessions demand. Each coffee brings a distinct origin story to the cup, which makes comparative cupping far more revealing. For enthusiasts who want to explore unusual flavor profiles, the mushroom dark roast offers a genuinely different tasting experience worth running through a cupping evaluation. Start with two contrasting origins and follow the steps in this guide. You’ll taste things you’ve never noticed before.
FAQ
What is coffee cupping and why does it matter?
Coffee cupping is a structured tasting method where coffee is brewed by steeping grounds in hot water and evaluated across dimensions like aroma, flavor, acidity, body, and balance. It removes brewing variables so you can assess the coffee itself, not the equipment.
What coffee-to-water ratio should I use for cupping?
Use 8.25g of coffee per 150ml of water, which equals approximately 55g per liter. This ratio concentrates flavor for clearer sensory evaluation compared to typical brew ratios.
At what temperature should I start tasting during a cupping session?
Begin your first tasting when the cup cools to around 155°F. Sweetness and acidity become clearer at 140°F, and body and balance are most readable around 130°F.
How many coffees should I cup in one session?
Limit sessions to 3 to 6 coffees. Cupping more than that leads to palate fatigue and reduces your ability to accurately distinguish between samples. Beginners should start with 2 to 3.
How do I know if my beans are fresh enough to cup?
Check the roast date on the bag. Beans older than 2 to 3 weeks post-roast have already lost significant aromatic compounds, which limits the quality of any cupping evaluation you run with them.


