


TL;DR:
- Most home coffee problems stem from four avoidable mistakes: stale beans, inconsistent grinding and dosing, incorrect water temperature, and neglected equipment. Fixing these issues results in immediate improvement, especially by using fresh beans, precise measurement, proper grinding, and clean gear. Following a step-by-step, variable-by-variable approach leads to consistently better coffee at home.
Most home coffee problems come from four avoidable mistakes: stale beans, inconsistent grind and dose, wrong water temperature, and neglected gear. Fix those four and your cup improves immediately.
The top mistakes at a glance:
- Stale or pre-ground beans → buy whole beans, grind right before brewing
- Not weighing your dose → use a digital scale, start at a 1:16 coffee-to-water ratio
- Wrong grind size or a blade grinder → match grind to method, switch to a burr grinder
- Poor water quality or temperature → use filtered water, target 195–205°F
- Rushing the brew or skipping the bloom → let grounds bloom 30–45 seconds before pouring
- Dirty equipment → rinse daily, deep clean weekly, descale monthly
The rest of this article covers each mistake in detail, with a taste-based diagnostic flow and a daily checklist you can print or save to your phone.
Table of Contents
- 1. Your beans are stale or stored wrong
- 2. You’re not weighing your coffee or dose
- 3. Your grinder is the problem
- 4. Your water is working against you
- 5. You’re rushing the brew or skipping the bloom
- 6. Your equipment is dirtier than you think
- 7. How to diagnose a bad cup by taste
- 8. Your daily pre-brew checklist
- 9. Why grinders and storage matter most: the evidence
- 10. Altitude and water hardness change your brew more than you’d expect
- 11. Descaling your appliances is not optional
- Key Takeaways
- The grinder gets more credit than it deserves, and that’s fair
- Fresh beans without the guesswork: what Qahwatalard offers
- Useful sources and further reading
- FAQ
1. Your beans are stale or stored wrong
Freshness is the foundation. Oxidation begins immediately after roasting, and once you open the bag, whole beans stay at peak flavor for about two weeks. Pre-ground coffee is worse: ground coffee loses its aroma within minutes of grinding because the increased surface area exposes volatile compounds to air almost instantly.
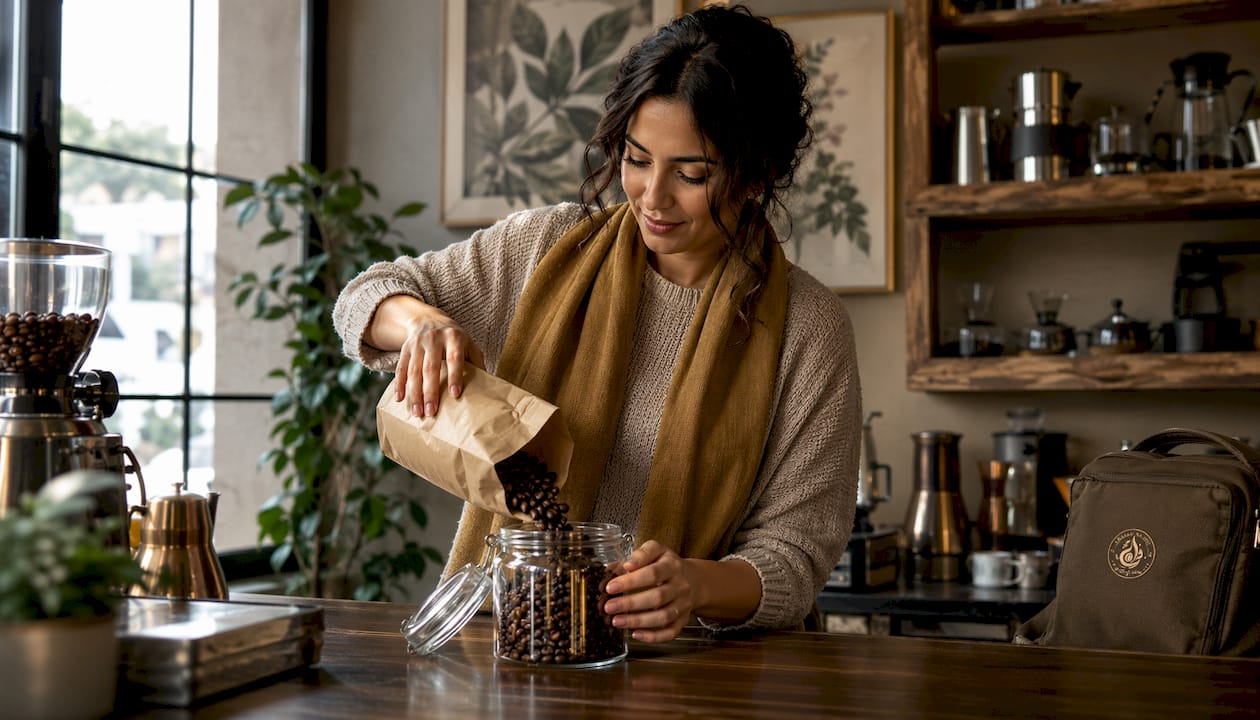
The four enemies of fresh coffee are air, heat, light, and moisture. The National Coffee Association recommends storing whole beans in an opaque, airtight container in a cool, dark place, ideally between 50–70°F. A kitchen counter next to the stove or kettle is one of the worst spots you can pick.
Quick storage rules:
- Transfer beans to an opaque, airtight container with a rubber-gasket lid immediately after opening
- Keep the container in a dark cupboard, away from heat sources and windows
- Buy only a small amount at a time so you’re always brewing fresh
- Grind only what you need, right before each brew
Pro Tip: Freezer storage works only for long-term reserves. Portion beans into single-use vacuum-sealed bags (3–4 months maximum), and never thaw and refreeze. Condensation from repeated temperature changes damages flavor faster than room-temperature air does.
Understanding how CO₂ degassing works after roasting helps explain why freshness matters so much for bloom behavior and overall extraction.
2. You’re not weighing your coffee or dose
Scooping by volume is the single most common reason a home brew tastes different every morning. Bean density varies with roast level and origin, so the same scoop can hold meaningfully different amounts of coffee depending on what you bought. Measuring by mass eliminates that variable entirely.
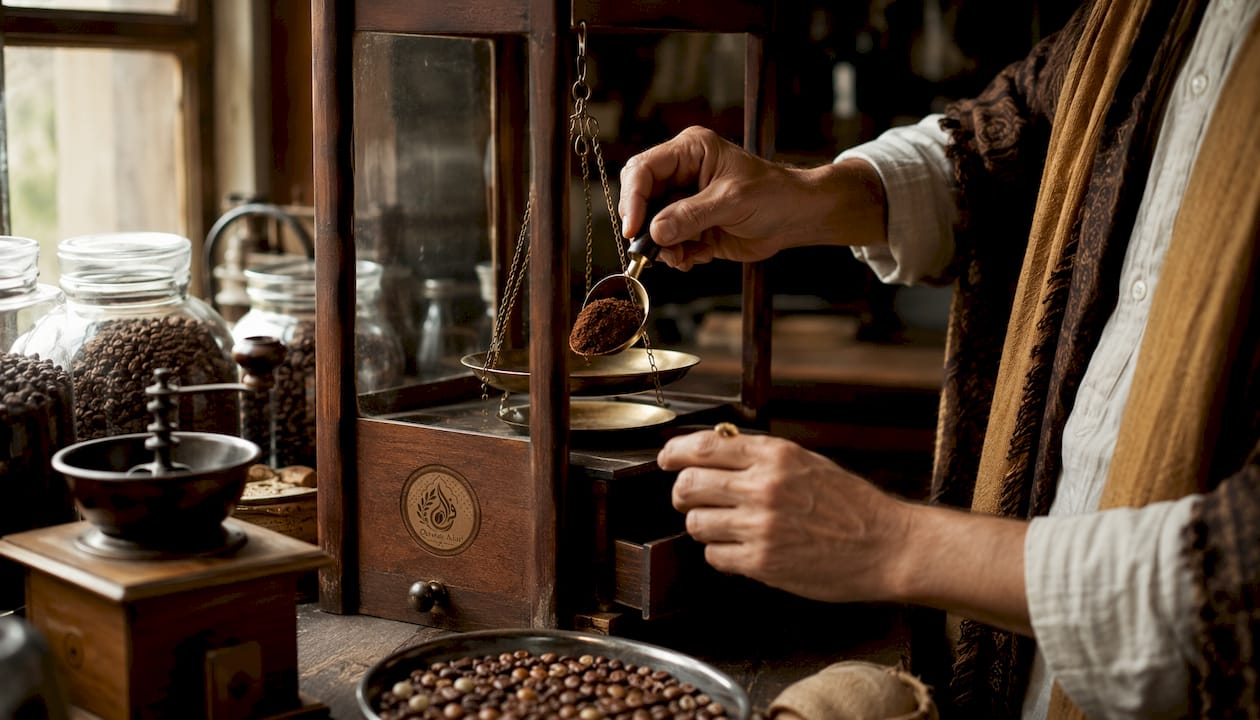
A digital kitchen scale costs less than a bag of specialty coffee and changes your results immediately. Start with a coffee-to-water ratio recommended for your brew method and adjust based on taste. Adjust from there based on taste, but always record what you used.
Grind size by method:
| Method | Grind size | Notes |
|---|---|---|
| French press | Coarse | Prevents over-extraction through mesh filter |
| Pour-over | Medium-fine | Adjust finer if sour, coarser if bitter |
| Drip machine | Medium | Match to basket filter type |
| AeroPress | Medium to fine | Shorter brew time = finer grind |
| Espresso | Fine | Dial in by shot time (25–30 sec target) |
For a deeper look at how particle size maps to each method, the grind size guide at Qahwatalard walks through the specifics.
3. Your grinder is the problem
Blade grinders chop beans randomly, producing a mix of fine powder and large chunks in the same batch. When you brew that, the fines over-extract (bitter) while the larger pieces under-extract (sour), and both happen simultaneously in the same cup. The result is a muddy, unbalanced flavor that no ratio or temperature adjustment can fully fix.
A burr grinder, whether conical or flat, crushes beans between two abrasive surfaces set at a fixed distance. Every particle comes out roughly the same size. The Specialty Coffee Association identifies grinder quality as the single most impactful equipment upgrade for home brewers, ahead of the brewer itself.
What to look for when choosing a grinder:
- Entry-level conical burr grinders handle most home methods well
- Hand grinders are a cost-effective option for single-dose brewing
- Flat burr grinders offer more uniform distribution but cost more
- Replace burrs when the grind starts producing more fines than usual
One practical rule: change only the grind size when troubleshooting. If you adjust grind, dose, and temperature at the same time, you won’t know which variable moved the cup.
4. Your water is working against you
Brewed coffee is roughly 98% water. Using tap water with heavy chlorine or very low mineral content will flatten the flavor no matter how good your beans are. Distilled water actually produces a dull, lifeless cup because coffee needs some dissolved minerals to carry flavor compounds properly.
Target brewing temperature: approximately the temperature just off boiling water suitable for coffee extraction. Water below that range under-extracts, leaving the cup sour and weak. Water above 205°F scorches the grounds and pushes bitterness. A practical fix: bring water to a full boil, then let it rest for about 30 seconds before pouring. That drops the temperature into the right window without a thermometer.
Simple water fixes:
- Use a pitcher filter (such as a Brita or ZeroWater) for daily brewing
- Avoid distilled or reverse-osmosis-only water; it strips minerals that carry flavor
- If your tap water tastes metallic or heavily chlorinated, filtered water makes a noticeable difference
- For ratio accuracy, remember that 1 gram of water equals 1 milliliter, so a scale doubles as a measuring tool
Flat or lifeless coffee is often a water problem, not a bean problem. If you’ve already dialed in your grind and dose and the cup still tastes dull, water quality is the next variable to check.
5. You’re rushing the brew or skipping the bloom
The bloom is the 30–45 second pre-infusion step where a small amount of hot water saturates the grounds and releases trapped CO₂. Skipping it means the escaping gas creates uneven channels during the main pour, and water rushes through some areas while bypassing others. The result is an unevenly extracted cup.
Standard pour-over sequence:
- Pre-heat your brewer and carafe with hot water, then discard it
- Add grounds and start your timer
- Pour just enough water to saturate the grounds (roughly 2× the coffee weight)
- Wait 30–45 seconds for the bloom to finish
- Pour in slow, concentric circles from center outward
- Complete the pour in 2–3 stages, keeping the water level steady
- Total brew time for most pour-overs: 3–4 minutes
Uneven agitation is a close second to skipping the bloom. For espresso, a distribution tool or Weiss Distribution Technique (WDT) breaks up clumps before tamping and reduces channeling significantly. For French press, a gentle stir at the start and a 4-minute steep before pressing is all you need.
Change one variable at a time. If the cup is off, adjust grind size first. If that doesn’t fix it, adjust temperature. Then dose. Then brew time. Running multiple changes at once makes it impossible to know what actually worked.
6. Your equipment is dirtier than you think
Coffee oils go rancid. A brewer or grinder that hasn’t been cleaned in weeks is coating every fresh batch with old, oxidized residue. The cup tastes bitter or musty before the water even touches the new grounds.
Cleaning schedule:
- Daily: Rinse the carafe, brew basket, and any removable parts with hot water
- Weekly: Deep clean the grinder hopper and burrs with a dry brush; wash brewer parts with hot water and a food-safe cleaner
- Monthly: Descale the boiler or kettle if you use one; run a descaling solution through your drip machine
Pro Tip: The smell test works. Sniff your grinder hopper and carafe before brewing. If either smells stale, oily, or musty, clean before you brew. A bitter cup that appears from nowhere is often a cleaning problem, not a bean or grind problem.
Avoid scented dish soaps on any part that contacts coffee. Even a small amount of residual soap alters the flavor. Hot water rinsing handles daily maintenance; reserve soap for the exterior and non-contact surfaces.
7. How to diagnose a bad cup by taste
When the cup tastes wrong, the extraction spectrum tells you where to look. Under-extraction tastes sour or acidic; over-extraction tastes bitter or astringent. A flat, lifeless cup usually points to stale beans or low-mineral water.
| Taste | Likely cause | First fix |
|---|---|---|
| Sour / sharp | Under-extracted | Grind finer or raise water temperature |
| Bitter / harsh | Over-extracted | Grind coarser or shorten brew time |
| Flat / dull | Stale beans or poor water | Check roast date; switch to filtered water |
| Thin / watery | Dose too low or ratio off | Increase coffee dose; recheck ratio |
| Muddy / uneven | Inconsistent grind (blade grinder) | Switch to burr grinder |
Troubleshooting a thin pour-over:
- Check dose first: are you at 1:16 or weaker?
- Check grind: is it coarser than medium-fine?
- Check water temperature: did you pour immediately from a boil?
- Check bloom: did you let it rest 30–45 seconds?
Work through that sequence one step at a time. Most thin cups resolve at the dose or grind stage.
8. Your daily pre-brew checklist
Run through these eight steps before every brew and you’ll eliminate most common mistakes before they happen:
- Check the roast date — beans should be within 2–3 weeks of opening
- Weigh your beans — use a digital scale, not a scoop
- Grind for your method — match coarseness to the brew style
- Pre-heat your vessel — pour hot water into the brewer and carafe, then discard
- Check filter and equipment cleanliness — rinse or replace filter; sniff for rancid oils
- Measure your water by weight — 1 g = 1 ml; target your ratio before pouring
- Use filtered water — especially if your tap water is chlorinated or mineral-heavy
- Log one variable — note what you changed from the last brew so you can repeat or adjust
That last step is the one most home brewers skip. Keeping a simple note on your phone (grind setting, dose, brew time, result) cuts the time to dial in a new bean from weeks to days.
9. Why grinders and storage matter most: the evidence
The science behind the two highest-impact fixes is straightforward. Particle size controls how much surface area water contacts during extraction. A consistent grind means every particle extracts at roughly the same rate. Mixed particle sizes from a blade grinder mean some particles are done extracting while others haven’t started, and both extremes end up in the same cup.
The SCA’s extraction guidance frames brewing as a controlled process: consistent inputs (particle size, dose, temperature, time) produce consistent outputs. When one input varies randomly, the cup varies randomly. That’s why the burr grinder and the digital scale solve more problems than any other equipment upgrade.
On the storage side, roast freshness determines how much CO₂ remains in the bean for bloom, how vibrant the aroma is, and how much flavor the water can actually extract. Beans stored in a warm, light-exposed spot lose those compounds faster than beans kept in a sealed, dark container. The fix costs nothing beyond a proper canister and a dark cupboard.
Practical takeaways:
- Grind single doses immediately before brewing when possible
- Replace grinder burrs when you notice more fines or a duller cup
- Use airtight, opaque storage and buy in small quantities
- Reserve freezer storage for long-term reserves only, in vacuum-sealed single-use portions
10. Altitude and water hardness change your brew more than you’d expect
Water boils at a lower temperature at high altitude. At 5,000 feet above sea level, water boils around 202°F instead of 212°F, which means your actual brew temperature is already closer to the lower end of the 195–205°F target range. At 7,500 feet or higher, boiling water may fall below the minimum extraction temperature before it even contacts the grounds. If you live in Denver, Salt Lake City, or anywhere in the mountain west, you may need to brew at a higher temperature setting or use a temperature-controlled kettle to compensate.
Water hardness is a separate variable. Very hard water (high calcium and magnesium) can over-mineralize the cup and leave scale buildup in your equipment. Very soft or filtered water can under-mineralize it, producing a flat result. The sweet spot for brewing water is a moderate mineral content, roughly 75–150 parts per million total dissolved solids. If you’re in a hard-water area and your coffee tastes chalky or your machine scales up quickly, a dedicated water filter or a third-party brewing mineral packet added to filtered water gives you more control.
11. Descaling your appliances is not optional
Limescale builds up inside kettles, drip machines, and any appliance that heats water repeatedly. It’s a flaky white mineral deposit that insulates heating elements, slows heat transfer, and flakes off into your brew. The result is inconsistent water temperature, longer heat-up times, and a faintly chalky or metallic taste in the cup.
Most drip machine manufacturers recommend descaling every 1–3 months depending on water hardness. A standard descaling solution or a diluted white vinegar run (followed by two plain water cycles to rinse) handles most home machines. Kettles with visible scale buildup on the interior walls should be descaled before the next brew. Beyond flavor, regular descaling extends the life of the equipment significantly. Ignoring it long enough can permanently damage heating elements, and no amount of fresh beans fixes a machine that can’t reach brewing temperature.
Key Takeaways
Fixing grind consistency and bean freshness delivers the fastest, most noticeable improvement to a home-brewed cup, ahead of any other single change.
| Point | Details |
|---|---|
| Weigh every dose | Use a digital scale at 1:16 ratio to eliminate batch-to-batch variation. |
| Switch to a burr grinder | Consistent particle size prevents simultaneous under- and over-extraction in the same cup. |
| Use filtered water at 195–205°F | Chlorinated or mineral-poor water flattens flavor regardless of bean quality. |
| Store beans correctly | Opaque airtight container, 50–70°F, use whole beans within about two weeks of opening. |
| Qahwatalard single-origin options | Qahwatalard offers fresh-roasted single-origin beans and pods for readers who want a clean starting point. |
The grinder gets more credit than it deserves, and that’s fair
The conventional advice in home brewing circles is to buy better beans first. That’s not wrong, but it’s incomplete. You can spend $30 on a bag of exceptional single-origin coffee and still produce a mediocre cup if you’re grinding it with a blade grinder and storing the rest in an open bag on the counter.
The grinder is the variable that compounds every other mistake. Inconsistent particle size means no ratio, temperature, or technique adjustment will fully compensate. You’re always correcting for a problem that shouldn’t exist. The same logic applies to storage: fresh beans give you something to work with; stale beans give you nothing to recover.
What this article’s guidance points toward is a simple priority order. Fix the grind first. Fix storage second. Then dial in water and temperature. Technique and equipment hygiene come after that. Most home brewers who follow that sequence in order see a meaningful improvement after the first change, which makes the next change easier to evaluate. The checklist in section 8 is designed for exactly that kind of incremental, one-variable-at-a-time improvement.
Fresh beans without the guesswork: what Qahwatalard offers
If you’ve worked through this article and realized the biggest gap is bean freshness, Qahwatalard sources and ships single-origin coffee roasted for traceability and flavor clarity. For readers who want convenience without sacrificing quality, the lineup includes single-serve coffee capsules that eliminate dosing errors entirely, a 60-pack pod option for consistent daily brewing, and origin-specific choices like Peru Coffee Pods for readers curious about how terroir affects flavor. The Max Caf Blend and Instant Coffee round out the range for different routines. Qahwatalard also carries whole-bean single-origin selections for brewers who want to apply everything in this article from the ground up.
Browse the full range at Qahwatalard and pick a starting point that fits your current setup.
Disclosure: Qahwatalard is the publisher of this article.
Useful sources and further reading
- National Coffee Association — storage and freshness guidance
- Specialty Coffee Association — extraction and grinding principles
- The Kitchn — how to store coffee beans for maximum freshness
- Food & Wine — professional roaster storage advice
- EatingWell — top home brewing mistakes and fixes
- BrewFYI — brew troubleshooting and extraction diagnostics
- Qahwatalard — understanding different coffee grinds
- Qahwatalard — coffee degassing explained
- Qahwatalard — what is coffee extraction
- Qahwatalard — how roasters shape coffee flavor
FAQ
What is the golden rule for coffee brewing?
Change one variable at a time. The Specialty Coffee Association frames brewing as a controlled process where consistent inputs produce consistent results; adjusting grind, dose, temperature, or time one at a time lets you identify exactly what moved the cup.
What ratio should I use for home brewing?
Start at 1:16 (1 gram of coffee to 16 grams of water) for drip and pour-over methods. Adjust finer or coarser based on taste, always measuring by weight rather than volume for repeatable results.
Why does my coffee taste sour?
Sour coffee is a sign of under-extraction. The most common causes are a grind that’s too coarse, water that’s too cool (below 195°F), or a brew time that’s too short. Grind finer first and see if that resolves it before changing other variables.
How long do coffee beans stay fresh after opening?
Whole beans stored in an opaque, airtight container stay at peak flavor for about two weeks after opening. Pre-ground coffee loses aroma within minutes of grinding, so for the best flavor, grind immediately before brewing.
Does Qahwatalard offer options for brewers who want to avoid dosing mistakes?
Yes. Qahwatalard’s single-serve capsules and pods provide pre-portioned doses, which removes the weighing variable entirely for brewers who want consistency without a scale. Whole-bean single-origin options are also available for those applying the full technique guidance in this article.


